This article on the Guardian website is a great 'What to do now?!' piece.
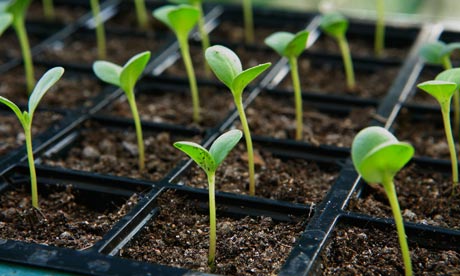
It's time to get sowing. Photograph: Alamy
It can be daunting knowing this is one of the most precious, critical
times for grow-your-owners – an uneasy feeling can descend as you spend
time on one task but ponder if you'd be best doing something different
instead. For those of you new to grow your own and learning that from
late February/early March onwards, veg gardeners tend to get a bit
frenetic, here's a run down of the main tasks to focus on.
Priority one: Plan what you're going to eat, buy and grow
Again
you may have already thought about this but if not, make a list of what
you eat as a household, what you can realistically grow and what you're
happier to buy in. Onions and maincrop potatoes will be on my to buy
list as they take up lots of room (my garden is tiny) and they're cheap
food. But I've just planted some heritage salad potatoes, sown some
'Cuor di Bue' beefsteak tomatoes and started off six different types of
basil. My reason? They all taste amazing when eaten fresh and you can't
find them readily in the shops.
Priority two: Buy seeds and order plug plants
Once
you've sorted out your list above, work out whether it's best to sow
seed (crops like radish, salad leaves and beetroot are robust and really
easy) or buy plants (chillies, aubergines and tomatoes need quite a lot
of heat and good light – can you give that to them?). Plants can be
bought later, freeing up valuable propagating space now. See my previous
blogpost here.
Priority three: Get your propagator set up
I've
had my heated propagator since I was 15 (I'm twice that age and more
now) and it's by far my best gardening investment. If you're sowing
indoors then I'd really recommend buying one. I set mine up in January
and it will run until April at the very least: getting it fully
functional now will mean that seeds can be sown as soon as you buy them.
Ones with a thermostatically-controlled heated base are more costly but
they're much more versatile, too, as the range of temperatures allows
you to sow all manner of seeds. Make sure they're positioned in good
light, and check daily for signs of germination.
Priority four: Get your ground ready
Now
that things are ticking along in the propagator and plants are ordered,
it's time to tend to your outdoor growing space (you don't want to be
in the situation where young plants are desperate to get out of their
pots and your ground is still smothered in weeds and last year's
detritus). Dig, hoe or mulch – whatever is your chosen method to clear
the ground. One nifty technique for very weedy patches is to create a
"stale seedbed". Rake cleared soil to a fine, crumbly seedbed, cover it
with clear plastic (a tunnel cloche is ideal) and then leave for a
fortnight. Weed seeds near the surface will germinate – then you can hoe
them off so that when you sow your veg, that flush of weeds will be
gone (hoe shallowly otherwise you'll just bring new weed seeds to the
surface).
Priority five: Tend to your growing on space
After
a quick dig, the next focus is your propagation area. Once seedlings
emerge they can stay in the propagator for a few days but you really
want to get them out of this environment as it's naturally very warm and
humid – great for germination but not for stocky, robust leaf growth
(you'll end up with sappy, lush growth that's a magnet for pests and
diseases). Find somewhere well lit from more than one side - an entrance
hall, porch, conservatory, or, for the blessed few, a greenhouse – and
warm (16C minimum). Young plants will happily sit here for three or four
weeks, until the weather behaves and you can start moving your plants
outside (but that's a whole different blogpost).
 It's time to get sowing. Photograph: Alamy
No comments:
Post a Comment